No Phone Audio? 9 Everyday Mistakes Causing Silence

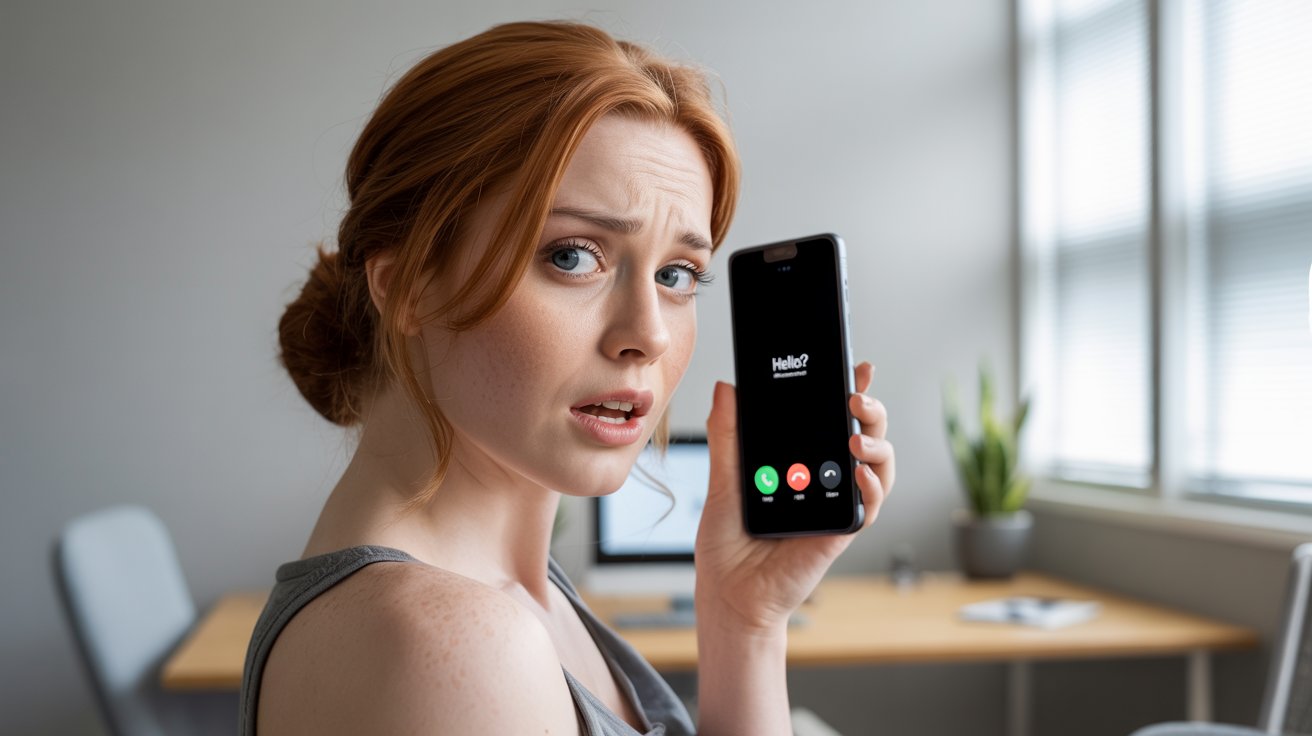
Nothing’s more frustrating than answering an important call only to hear complete silence. You can see the call is connected, but no sound comes through. Before you panic about expensive repairs or buying a new phone, the fix might be simpler than you think.

Most audio problems during phone calls stem from common oversights that take just minutes to resolve. From accidentally activated settings to debris blocking your speaker, these nine everyday mistakes could be the culprit behind your silent phone calls.

Why Is There No Sound on My Phone During Calls?

Phone call audio can disappear for several reasons, but the most frequent causes are surprisingly simple. Your phone might be routing sound to the wrong output, or a setting got changed without you realizing it.

Common reasons call audio suddenly disappears

The volume might be turned all the way down during calls. Unlike media volume, call volume has its own separate setting. During your next call, try pressing the volume up button to see if sound returns.

Another possibility is that your phone’s proximity sensor is malfunctioning. This sensor should detect when the phone is near your ear and turn off the screen. When it’s not working properly, your face might accidentally press buttons that mute the call or change audio settings.

Software glitches can also cause temporary audio loss. Apps running in the background might interfere with call audio, or a recent update could have changed your phone’s default settings.

How to check if the earpiece or speakerphone is the issue

Test your earpiece by making a call and listening normally. Then tap the speakerphone button to see if you can hear through the main speaker. If one works but not the other, you’ve identified which component needs attention.

Try using wired headphones during a call. If you can hear through headphones but not through the phone’s built-in speakers, the issue is likely hardware-related rather than a software problem.

Could Bluetooth Be Redirecting the Sound?

Your phone might be sending call audio to a Bluetooth device you forgot was connected. This commonly happens with car stereos, wireless headphones, or speakers that remain paired even when you’re not actively using them.

How to see if your phone is paired with another device

Check your Bluetooth settings to see all connected devices. On iPhone, go to Settings > Bluetooth. On Android, find Bluetooth in your Settings menu. Look for any devices showing as “Connected” even if they’re not nearby.

During a call, you can also check if there’s a Bluetooth icon in your call screen. This indicates audio is being routed through a Bluetooth connection rather than your phone’s speakers.

Disconnecting and resetting Bluetooth to restore sound

The quickest fix is turning Bluetooth off entirely during your call. Swipe down to access your phone’s control center and tap the Bluetooth icon to disable it. Your call audio should immediately return to the phone’s speakers.

For a permanent solution, forget devices you no longer use regularly. In your Bluetooth settings, tap the “i” icon next to unwanted devices and select “Forget” or “Unpair.”

Why Is My Phone Stuck in Headphone Mode When Nothing’s Plugged In?

Some phones get confused and think headphones are plugged in even when the jack is empty. This sends all audio to non-existent headphones, creating complete silence during calls.

How moisture or dust triggers headphone mode

Water or dust in the headphone jack can trigger the sensors that detect when headphones are connected. Even small amounts of moisture from humidity or cleaning can cause this problem.

Lint from pockets or bags can also get packed into the headphone jack, fooling your phone into thinking something is plugged in. This is especially common with phones that have been carried in pockets with tissues or cotton items.

Quick fixes to exit headphone mode without repairs

Try plugging in headphones and then removing them several times. This can help reset the sensor that detects when headphones are connected.

Gently clean the headphone jack with a dry cotton swab or compressed air. Be careful not to push debris deeper into the jack. For phones without headphone jacks, this applies to the charging port, which often handles audio connections.

Can Dust or Debris Block My Phone Speaker?

Your phone’s speaker grilles can collect dust, lint, and other debris over time. Even small blockages can significantly reduce volume or completely muffle sound during calls.

Signs that dirt is affecting your phone’s audio

If call volume seems lower than usual or sounds muffled, debris might be the culprit. You might notice that speakerphone works better than the earpiece, or vice versa, if only one speaker is blocked.

Check your phone’s speaker grilles with a flashlight. You might see visible dust, lint, or other particles blocking the tiny holes where sound comes through.

Safe ways to clean your speaker without damage

Use a soft, dry toothbrush to gently brush debris away from speaker grilles. Brush in a direction that pulls debris out rather than pushing it in deeper.

Compressed air can also help, but use short bursts and keep the can upright to avoid spraying moisture into your phone. Never use liquids or wet cleaning methods near speakers.

Does Do Not Disturb or Silent Mode Mute All My Phone’s Sound?

Many users wonder if activating Do Not Disturb or Silent Mode will completely mute all sounds on their phone. These modes are designed to provide peace and quiet while still allowing for some customization of notifications.

Checking Sound Settings for Accidental Mute Modes

It’s possible that your phone’s sound settings have been accidentally adjusted. Double-check if Silent Mode is activated or if the volume slider is turned down to zero. Additionally, ensure that your phone isn’t connected to a Bluetooth device, like headphones, as this might redirect audio elsewhere. Navigate to your phone’s settings, and under the sound options, verify if any modes like Do Not Disturb, Silent Mode, or Airplane Mode are toggled on.

How to Customize Do Not Disturb to Allow Calls and Alerts

Do Not Disturb can be customized to suit your preferences. You can allow calls, alarms, or specific app alerts to bypass this mode. On most devices, head to the settings and locate the Do Not Disturb section. Within this menu, you have the option to create exceptions for example, allow calls from select contacts, enable alarms, or permit reminders to break through the silence. Tailoring these settings ensures you won’t miss critical alerts while still maintaining focus or relaxation.

Is It a Software Glitch or Hardware Failure?

If your phone’s sound issues persist after ruling out mute modes, the root cause might be either software-related or a hardware malfunction. Identifying the origin of the problem can save time and guide you toward the correct solution.

How to Tell if the Problem Is Software-Based

A software glitch could be the culprit, especially after a recent system update or app installation. Restart your device to see if the issue resolves itself, and check if the operating system or apps require updates. Additionally, try playing different audio types, such as ringtones, music, or videos, to determine if the problem is widespread. Restoring your device’s settings to default can also eliminate potential software conflicts.

When to Suspect Physical Damage to Your Phone

Physical damage could impair your phone’s sound capabilities. Check for visible damage near the speakers or ports, such as dents or debris. Water exposure is another common cause of hardware issues; even small amounts of moisture can disrupt sound output. If your phone recently experienced a strong impact or liquid exposure, it’s likely a hardware problem and may require professional repair.

Will a Restart or Software Update Resolve the Audio Issue?

If your phone’s audio suddenly stops working, a restart or software update could potentially resolve the issue. These troubleshooting steps are often effective because they address common technical glitches that can disrupt sound functionality.

Why a Simple Reboot Often Fixes Sound Problems?

A reboot refreshes your phone’s operating system and clears temporary data or processes that may be causing conflicts. This is a quick and non-invasive solution that often resolves unexpected audio malfunctions resulting from system overload or small software inconsistencies. Simply turn off your phone, wait for a few seconds, and turn it back on to reset its internal processes.

Updating Your Phone’s OS to Patch Audio-Related Bugs

Operating system updates frequently include fixes for known issues, including audio-related bugs. Developers monitor and address problems reported by users, releasing updates to improve device performance. To ensure you benefit from these patches, regularly check for updates in your phone settings and install them promptly. Keeping your software current not only resolves potential audio problems but also enhances overall device stability and security.

How Can I Fix No Audio on My Phone for Media or Calls?

When your phone exhibits no sound during media playback or calls, there are systematic steps you can follow to identify and fix the issue. These approaches will help restore sound quickly, whether the problem lies in the software, settings, or hardware.

Step-by-Step Checks to Restore Sound Quickly

  1. Adjust Your Volume Settings: Ensure your media and call volumes are turned up. Sometimes, a simple setting adjustment is all it takes.
  2. Check Silent/DND Modes: Verify that your device is not on silent or Do Not Disturb mode, as these can mute sounds.
  3. Inspect Connected Devices: Disconnect any Bluetooth earbuds or speakers that may be stealing the audio output from your phone.
  4. Restart Your Phone: Perform a reboot to reset temporary software glitches.
  5. Test with Different Apps: Play sound from different apps or make a call to determine if the issue is app-specific.
  6. Clear Cache for Relevant Apps: If the no-sound issue is isolated to certain apps, clearing the app cache in your phone’s settings might help.

Recommended Apps and Tools for Diagnosing Audio Issues

Several apps and tools are available to assist in diagnosing and troubleshooting audio problems:

  • SoundAbout (Android): Helps redirect sound output to various sources, including headphone jacks, speakers, or Bluetooth devices.
  • Speaker Tester: Enables you to test the performance of your phone’s speakers and pinpoint potential faults.
  • Integrated Diagnostics (iOS/Android): Many modern smartphones offer built-in diagnostic tools within their settings to check hardware functioning, like speakers and microphones.

By following these steps and utilizing the right tools, you can resolve most audio issues on your phone without requiring professional assistance.

Get Your Phone Talking Again

Most phone audio problems have simple solutions that don’t require professional repair. Start with the easiest fixes like checking your volume settings and Bluetooth connections before moving on to physical cleaning.

If none of these solutions work, the issue might be hardware-related and require professional diagnosis. But in most cases, one of these nine common mistakes is the reason for your phone’s sudden silence.

No Phone Audio

10 Tips: How to Fix Slow Mobile Data Issues

Watching a video buffer for the third time in five minutes? Waiting endlessly for a webpage to load? Slow mobile data can turn simple tasks into frustrating ordeals that eat away at your productivity and patience.

Mobile data slowdowns happen for various reasons. Network congestion during peak hours can throttle your connection speed. Outdated software might create compatibility issues with cell towers. Background apps could be quietly consuming your bandwidth. Physical barriers like buildings or terrain may interfere with signal strength.

The good news is that most mobile data problems have straightforward solutions. These ten proven tips will help you diagnose the root cause of your slow connection and get back to seamless browsing, streaming, and downloading.

1- Check Your Data Plan

Start with the basics: examine your current data usage and plan limits. Many carriers implement throttling once you exceed your monthly allowance, dramatically reducing speeds until your next billing cycle.

Log into your carrier’s app or website to review your data consumption. If you’re consistently hitting your limit mid-month, consider upgrading to a plan with more high-speed data. Some carriers offer unlimited plans that throttle speeds after a certain threshold rather than charging overage fees.

You can also monitor usage directly on your phone. iPhones track data under Settings > Cellular, while Android devices show usage in Settings > Network & Internet > Data Usage. Set up alerts to notify you when approaching your monthly limit.

2- Restart Your Device

A simple reboot resolves many connectivity issues by clearing temporary files and refreshing network connections. Your phone maintains numerous background processes that can gradually slow performance over time.

Power off your device completely, wait 30 seconds, then restart. This forces your phone to re-establish its connection with nearby cell towers and can often restore normal data speeds immediately.

Consider restarting weekly as preventive maintenance, especially if you rarely turn off your phone. Regular reboots help maintain optimal performance across all system functions.

3- Check Network Settings

Incorrect Access Point Name (APN) settings can severely impact data performance. These settings tell your phone how to connect to your carrier’s network for data services.

Navigate to your phone’s network settings and verify the APN configuration matches your carrier’s specifications. Most carriers provide these settings on their websites or through customer service. iPhone users can find APN settings under Settings > Cellular > Cellular Data Options > Cellular Data Network.

If settings appear incorrect, contact your carrier for the proper configuration. Some carriers send automatic updates, but manual entry may be necessary after switching providers or traveling internationally.

4- Clear Cache and Data

Apps accumulate cached data over time, which can slow overall device performance and consume bandwidth unnecessarily. Clearing these temporary files frees up storage space and can improve data speeds.

On Android devices, go to Settings > Apps, select individual apps, and choose “Clear Cache.” For a more thorough cleaning, select “Clear Data,” though this will reset app preferences and login information.

iPhone users can offload unused apps through Settings > General > iPhone Storage. This removes the app while preserving documents and data, which you can restore by reinstalling from the App Store.

Focus on clearing cache for browsers, social media apps, and streaming services, as these typically accumulate the most temporary data.

5- Close Background Apps

Multiple apps running simultaneously can consume significant bandwidth, even when you’re not actively using them. Social media apps, email clients, and cloud storage services frequently sync data in the background.

Review which apps have permission to use cellular data during background refresh. On iPhones, check Settings > General > Background App Refresh. Android users can find similar options under Settings > Apps > [App Name] > Mobile Data.

Disable background data for non-essential apps, keeping it enabled only for critical services like messaging, email, or navigation apps you rely on for notifications.

6- Update Your Phone’s Software

Operating system updates often include improvements to cellular connectivity and network performance. Carriers and phone manufacturers regularly release patches that optimize how devices communicate with cell towers.

Check for available updates in your phone’s settings menu. iPhones show updates under Settings > General > Software Update, while Android devices typically display them in Settings > System > System Update.

Enable automatic updates to stay current with the latest performance enhancements. Update during off-peak hours or while connected to Wi-Fi to avoid using mobile data for large downloads.

7- Reset Network Settings

Persistent connectivity issues may require resetting all network-related settings to factory defaults. This clears saved Wi-Fi passwords, Bluetooth pairings, and cellular settings, essentially giving your phone a fresh start with network connections.

On iPhones, go to Settings > General > Transfer or Reset iPhone > Reset > Reset Network Settings. Android users can find similar options under Settings > General Management > Reset > Reset Network Settings.

Note that you’ll need to re-enter Wi-Fi passwords and reconfigure any custom network preferences after completing this reset. However, it often resolves stubborn connectivity problems that other troubleshooting steps cannot fix.

8- Use a Network Analyzer App

Network diagnostic apps provide detailed information about signal strength, network type, and connection quality. These tools help identify specific issues affecting your mobile data performance.

Popular options include OpenSignal, Network Cell Info Lite, and Speedtest by Ookla. These apps can show whether you’re connected to 3G, 4G, or 5G networks, measure actual download and upload speeds, and identify nearby cell towers.

Run speed tests at different times and locations to establish patterns. Consistently slow speeds across multiple locations suggest device or plan issues, while location-specific problems indicate network coverage gaps.

9- Check for Physical Obstructions

Physical barriers significantly impact cellular signal strength. Buildings, hills, trees, and even weather conditions can interfere with the radio waves that carry your mobile data.

If you experience slow speeds in specific locations, try moving to different areas to test signal strength. Higher elevations, open spaces, and positions near windows often provide better connectivity.

Metal buildings, underground locations, and dense urban areas pose particular challenges for cellular signals. Understanding these limitations helps you anticipate and work around connectivity issues in problematic locations.

10- Contact Your Service Provider

When self-troubleshooting doesn’t resolve slow data issues, your carrier’s technical support team can provide specialized assistance. They have access to network diagnostics and account-specific information that may reveal underlying problems.

Before calling, gather relevant information: your location, specific times when speeds are slow, results from speed tests, and troubleshooting steps you’ve already attempted. This helps support representatives diagnose issues more efficiently.

Ask about network maintenance, tower upgrades, or known coverage issues in your area. Carriers sometimes offer temporary solutions or account credits while addressing infrastructure problems.

Get Back to Full Speed

Slow mobile data doesn’t have to disrupt your daily routine. Most connectivity issues stem from simple causes with straightforward solutions. Start with basic troubleshooting like restarting your device and checking your data plan, then progress to more advanced steps if needed.

Regular maintenance, including software updates and cache clearing, prevents many performance problems before they occur. When technical solutions fall short, don’t hesitate to contact your carrier for professional support.

Try these tips systematically, and you’ll likely find your mobile data running at full speed again. Fast, reliable connectivity is within reach with the right approach to troubleshooting.

Solve 5 Common iPhone Issues with Expert Help 

Your iPhone is an incredible tool, but like any gadget, it isn’t perfect. From apps freezing mid-task to mysterious battery drains, there’s no shortage of challenges iPhone users face. The good news? Most issues are easy to diagnose and resolve with the right knowledge and tools. 

This guide covers five of the most common iPhone issues and how you can fix them, or when it might be time to turn to an expert for assistance. 

1. iPhone Battery Draining Too Fast 

There’s nothing worse than your iPhone battery dropping to 10% halfway through the day. If this happens to you regularly, don’t panic. Battery drain is a common problem with modern smartphones, including the iPhone. 

Steps to Fix It 

  • Check Battery Usage: Go to Settings > Battery to identify which apps are consuming the most power. If you notice “Background Activity” for any app, consider turning off background app refresh. 
  • Enable Low Power Mode: Found under Settings > Battery, this mode reduces power consumption by disabling unnecessary background processes. 
  • Update iOS: Outdated software can drain your battery due to inefficiencies in energy management. Make sure you’re running the latest iOS. 
  • Repair or Replace the Battery: If none of these solutions help, your battery could be degraded. Visit an Apple Store or a certified technician to test and replace it. 

When to Call an Expert 

If you see unexpected shutdowns or the battery health percentage (found under Settings > Battery > Battery Health) is below 80%, professional help is often the best route. 

2. Frozen or Unresponsive Screen 

Your screen freezes mid-chat or refuses to respond just as you’re trying to answer an important call. Frustrating, right? Here’s how to address it. 

Steps to Fix It 

  • Force Restart: For iPhone 8 and later, press and release the Volume Up button, then press and release the Volume Down button, followed by holding the Side Button until the Apple logo appears. 
  • Free Up Storage: Low storage can lead to lag and unresponsiveness. Check your available space under Settings > General > iPhone Storage and delete unwanted apps or files. 
  • Update Problematic Apps: If the freeze happens while using specific apps, consider updating them to the latest version. 

When to Call an Expert 

If your screen remains unresponsive after multiple force restarts or becomes stuck frequently, this could indicate a deeper software or hardware issue, and you’ll need professional assistance. 

5 Common iPhone Issues

3. Wi-Fi Not Connecting 

Your iPhone keeps disconnecting from Wi-Fi despite a strong signal, or it won’t connect at all. This issue can be especially frustrating for remote workers or streamers. 

Steps to Fix It 

  • Forget the Wi-Fi Network: Go to Settings > Wi-Fi, tap the information icon (i), and select Forget This Network. Then reconnect and re-enter the password. 
  • Restart Devices: Restart both your iPhone and router. Often, rebooting clears temporary bugs preventing connectivity. 
  • Reset Network Settings: Navigate to Settings > General > Reset > Reset Network Settings. This will also remove stored Wi-Fi passwords, so note them beforehand. 
  • Update iOS: Connectivity issues are sometimes fixed with the latest iOS patch. 

When to Call an Expert 

If multiple devices work fine on the same network but your iPhone doesn’t, or if resetting network settings doesn’t work, there might be a hardware issue with your phone’s antenna. Time to contact an Apple technician. 

4. iPhone Running Slowly 

Is your iPhone taking forever to load apps? Whether it’s lagging animations or painfully slow browsing, a sluggish phone can ruin your experience. 

Steps to Fix It 

  • Close Background Apps: Swipe up from the bottom of your screen and close unnecessary apps. 
  • Delete Unnecessary Files: Videos, photos, and old app data can hog storage and slow your phone. Use Settings > General > iPhone Storage to clear space. 
  • Disable Auto-Background Activities: Go to Settings > General > Background App Refresh and turn off non-essential apps. 
  • Restart Your iPhone: A regular reboot clears temporary system glitches. 

When to Call an Expert 

If none of these tips help and your iPhone slows to a crawl consistently, it could be due to a hardware issue like a failing CPU or storage drive. Seek expert advice. 

5. App Crashes or Won’t Open 

Apps that crash the second you open them or don’t open at all can ruin your productivity. Luckily, this issue is relatively easy to resolve. 

Steps to Fix It 

  • Update the App: Check the App Store for updates to ensure you’re running the latest compatible version. 
  • Reinstall the App: Uninstall the problematic app, restart your phone, and reinstall it from the App Store. 
  • Check Compatibility: Some apps may no longer support older iOS versions. If this is the case, update your software under Settings > General > Software Update

When to Call an Expert 

If the issue persists across apps and a factory reset doesn’t fix it, there may be an underlying software corruption or hardware problem that requires expert help. 

Is It Time for Expert Help? 

While minor iPhone issues are often fixable with some troubleshooting, persistent or severe problems might require professional intervention. Apple Stores and certified repair centers are equipped to handle everything from faulty antennas to degraded batteries. Don’t skip on expert advice when it could save your device. 

If you’re struggling with any of the issues listed above and need a helping hand, consider reaching out to an Apple specialist for guidance and repairs. 

Recent post

No Phone Audio

No Phone Audio? 9 Everyday Mistakes Causing Silence

Fix Slow Mobile Data Issues

10 Tips: How to Fix Slow Mobile Data Issues

Common iPhone Issues

Solve 5 Common iPhone Issues with Expert Help 

Scroll to Top